
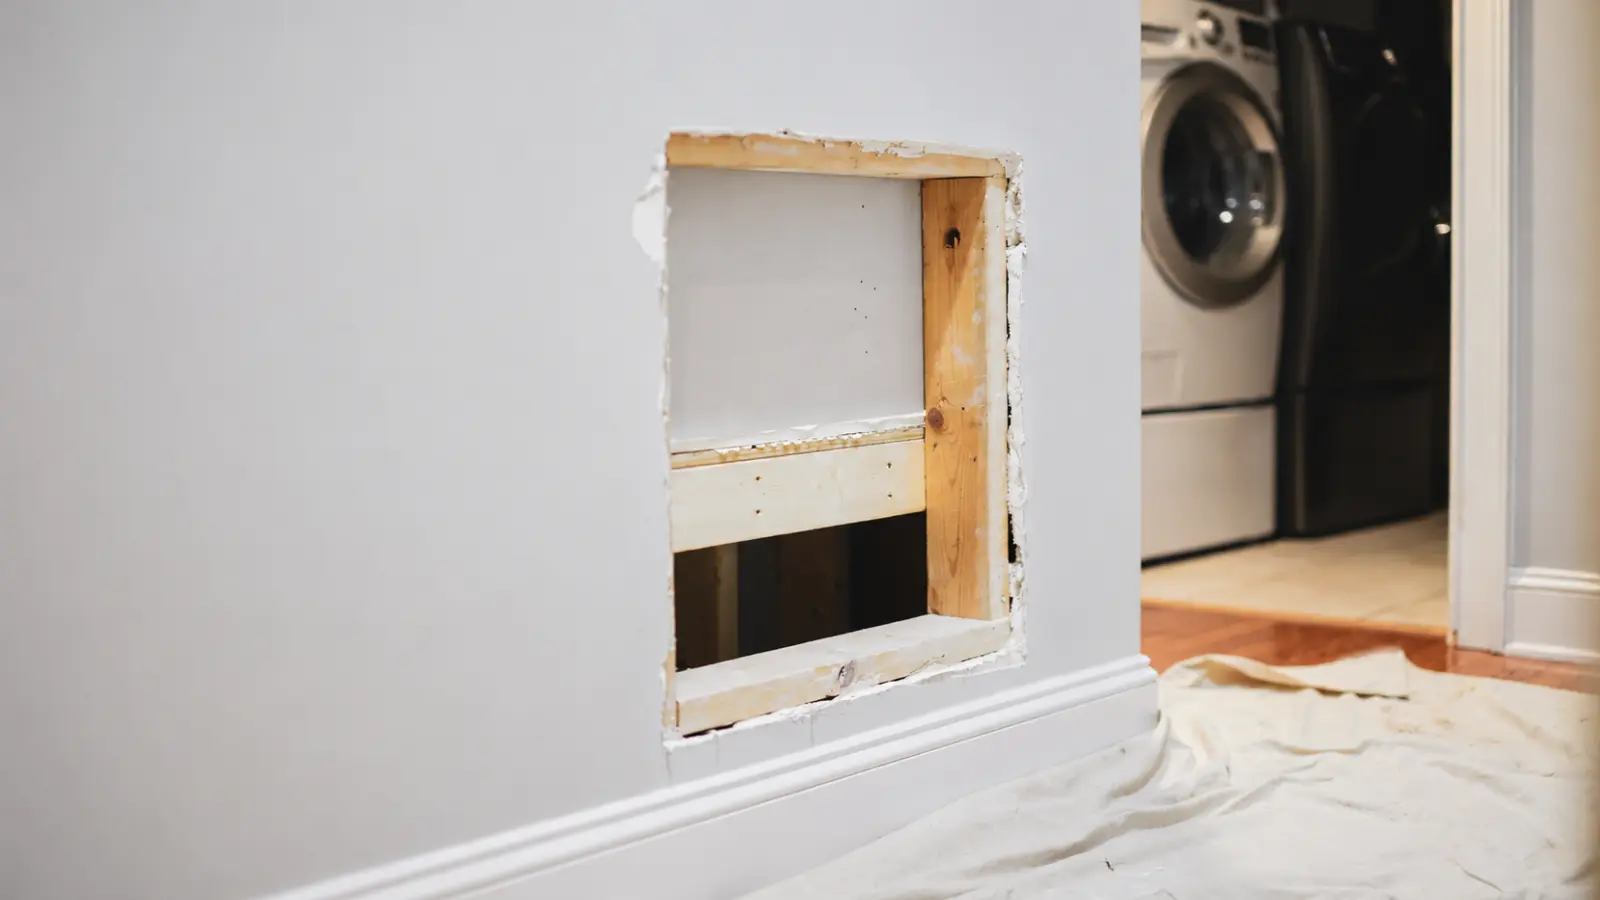
Learning how to patch a large hole in drywall starts with replacing the missing material, not filling the opening with spackle. Unlike small nail holes or surface dents, larger openings usually need a fitted drywall patch that restores a solid surface before the seams can be finished and painted.
The right repair method depends on the size of the hole, the condition of the surrounding drywall, and the support available behind the wall. A California patch can work for certain smaller openings without separate backing, while larger sections may need drywall repair clips or support from the wall framing. Before cutting, it’s also important to check for hidden utilities, moisture damage, and any fire-resistance requirements.
This guide explains how to patch a large hole in drywall step by step, from choosing a repair method and preparing the opening to installing the patch, taping the seams, sanding, priming, and painting. You’ll also learn which materials to use, how to avoid common finishing problems, and when damaged walls or ceilings require professional attention.
Choose the Right Repair Method
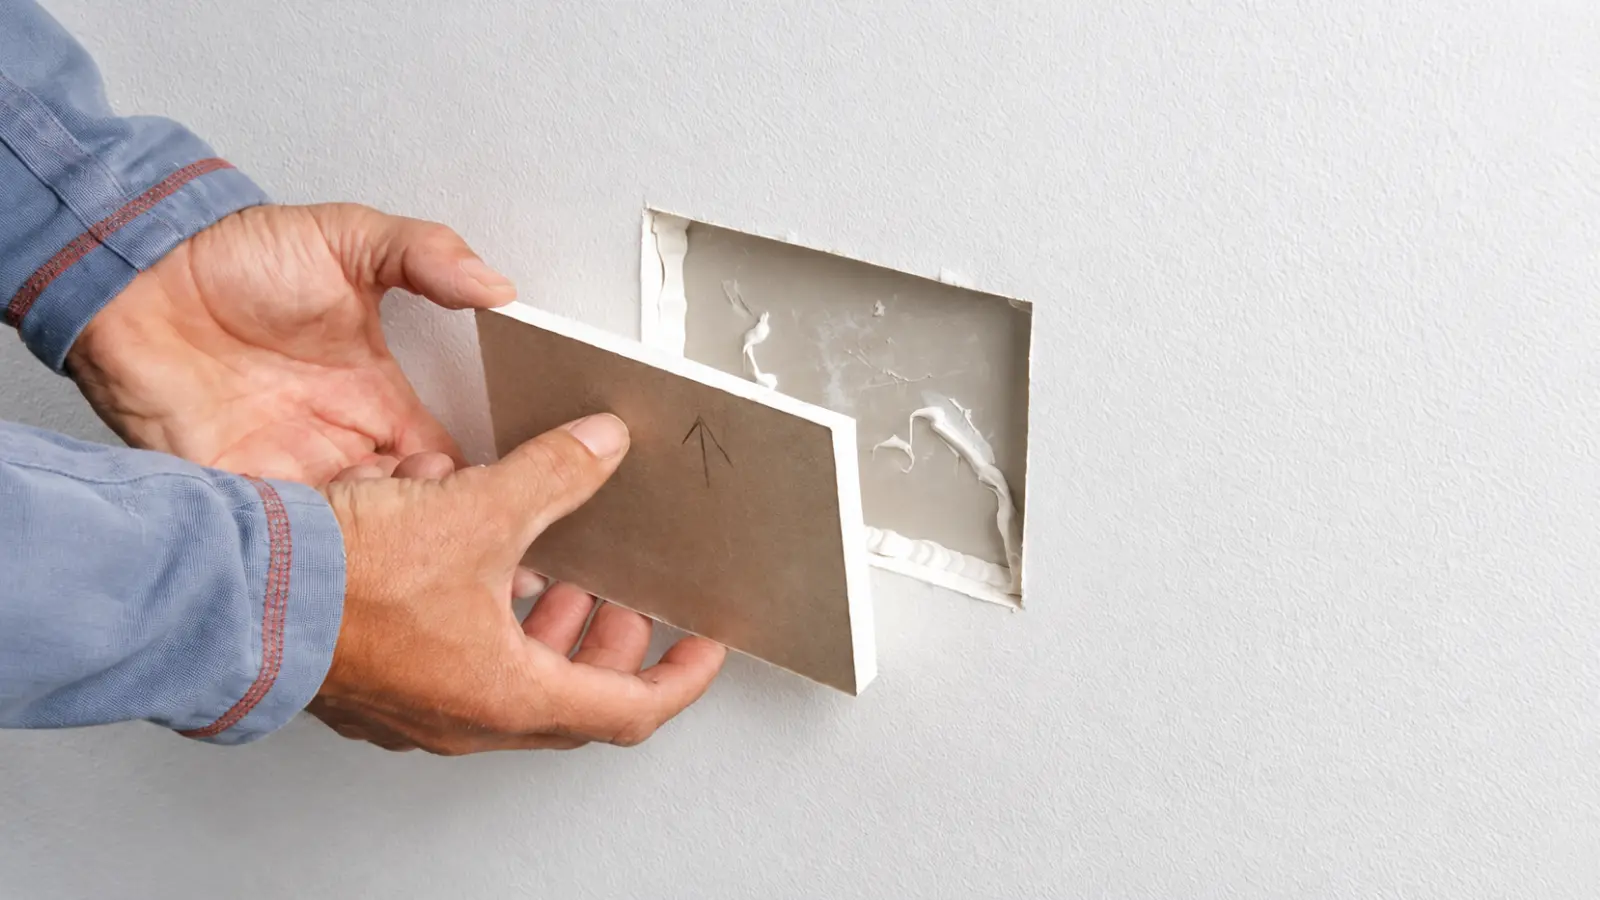
Hole size and the condition of the board decide the method. The sizes below are manufacturer examples, so check the instructions for the product you buy.
| Method | Best For | What to Know |
|---|---|---|
| California patch (paper-faced, no backing) | Holes about 6 by 6 inches or smaller with sound edges. USG says it also works on 5/8-inch or layered drywall and on lath and plaster | Needs no backing, but the paper flange must bond to sound face paper around the opening |
| Repair clips | Larger holes and water-damaged sections. USG’s clips are made for 1/2-inch and 5/8-inch panels, including one-hour fire-rated drywall | The clips support the edges of the new panel. Follow the package for screw placement |
| Cut to the framing and replace a section | Damage that spans a wide area, or board too weak to hold an edge | You must know where framing and utilities are before you cut |
| Self-adhesive mesh or metal patch kit | Holes too big for filler but within the kit’s printed size range | Check the size range on the package. At the top of that range, a California patch or clips usually make a flatter repair |
If your hole is only a fastener mark or a shallow dent, filler is enough and none of these methods is needed.
Check the Wall Before You Cut
Stop First If You See Any of This
Running water, sparks, scorching, or a burning smell; water that may have reached electrical equipment; or a ceiling that is wet, sagging, or bowed. Do not work beneath a sagging ceiling. If wiring, pipes, or ducts are visible in the opening, do not cut or fasten near them. Treat any cable as live until a qualified person has verified it is not. Shut off power or water only if you can do so safely, then get qualified help.
A damaged opening is useful information. Do not make it larger until you know why it is there and what is behind it.
Check the Cause of the Hole
An impact hole in a dry, firm wall is simple damage. A hole from a leak, a failed fastener, a moving door, or a damaged wall system will come back unless the cause is fixed first. If water is involved, see the water damage section below before you close the wall.
Check for Utilities and Hidden Conditions
Never cut blindly. Shine a flashlight into the opening and look for wiring, pipes, ducts, and blocking. Use a stud finder to mark framing, but do not assume where wiring runs from the position of a nearby outlet or from a typical framing pattern. If you can’t tell whether the area you plan to cut and screw into is clear, stop and get qualified help.
Check the Surrounding Drywall
The edge of the repair has to land in firm board. Press around the opening. Soft, swollen, crumbly, or delaminated drywall is not a reliable edge, so cut back until the board is firm. If the soft area is large, it may be water damage, which changes the job.
Tools and Materials
Gather only what your chosen method needs.
- Required: a utility knife with fresh blades, a drywall or keyhole saw, a tape measure, a pencil, a straightedge or square, scrap drywall or a repair panel of the same thickness as the wall, joint tape and joint compound, a 4- to 6-inch taping knife, drywall screws and a screwdriver or drill, a sanding sponge or fine sandpaper, primer, matching paint, eye protection, and a dust mask.
- Optional: repair clips (the package includes screws), a stud finder, a flashlight, a wider knife for feathering the finish, a HEPA vacuum, and a drop cloth.
Match the panel thickness first. If the original wall is moisture-resistant, sound-control, impact-resistant, or part of a documented fire-resistance design, the right replacement depends on the product documentation, not only on thickness.
Warning: Lead Paint in Older Homes
Homes built before 1978 may have lead-based paint, and cutting, scraping, and sanding painted drywall can create lead dust. If you are not sure of your home’s age, assume the paint could contain lead. The EPA’s Renovation, Repair and Painting rule generally does not cover homeowners working on their own home, but it does cover paid contractors and rental properties, and the EPA recommends hiring a lead-safe certified contractor for renovation work in pre-1978 homes.
If you do the work yourself, the EPA’s lead-safe practices for DIYers include sealing the work area with plastic sheeting, misting before cutting or sanding, cleaning with a HEPA vacuum and damp cloths, and keeping children out. A large hole means more cutting and sanding than a small one, so consider hiring help.
How to Patch a Large Hole in Drywall
Prepare the Opening (Both Methods)
- Fix the cause and confirm the wall is dry. The board around the hole should feel dry and firm. If it doesn’t, go to the water damage section.
- Clear the damage. Use the utility knife to trim torn paper and loose gypsum back to firm board. Cut only as much as you need to reach a solid edge. You should be able to see that the area you plan to cut or screw into is free of wiring and plumbing.
- Protect the room. Lay a drop cloth and tape plastic over nearby openings or furniture. Wear eye protection and a dust mask.
Method A: California Patch for Holes About 6 by 6 Inches or Smaller
This no-backing method uses the paper face of a scrap piece of drywall as a flange that bonds to the wall. Follow these steps, based on USG’s repair guide.
- Cut the patch. Measure the hole. Cut a square of same-thickness drywall 2 inches larger than the hole in each direction.
- Score the back. Lay the patch face-down. Score the brown back paper with a utility knife to the size of the hole, leaving 1 inch of extra paper on every side. Do not cut the face paper. Remove the gypsum so only a flap of face paper remains around the edge.
- Trace and cut the wall opening. Press the patch over the hole and trace around the gypsum section with a pencil. Cut the wall opening along the line with a drywall saw, after confirming nothing is behind it.
- Glue the flange. Spread a thin layer of joint compound on the paper edges with a 4- to 6-inch knife. Use just enough for the paper to stick.
- Set the patch flush. Press the patch into the opening until its face is even with the wall, and wipe off the excess compound. The edge should show no gap and no ridge.
- Skim the patch. Spread a thin layer of compound over the whole patch and let it dry. Sand, then repeat until the surface is smooth.
Method B: Repair Clips for Larger Holes and Water-Damaged Sections
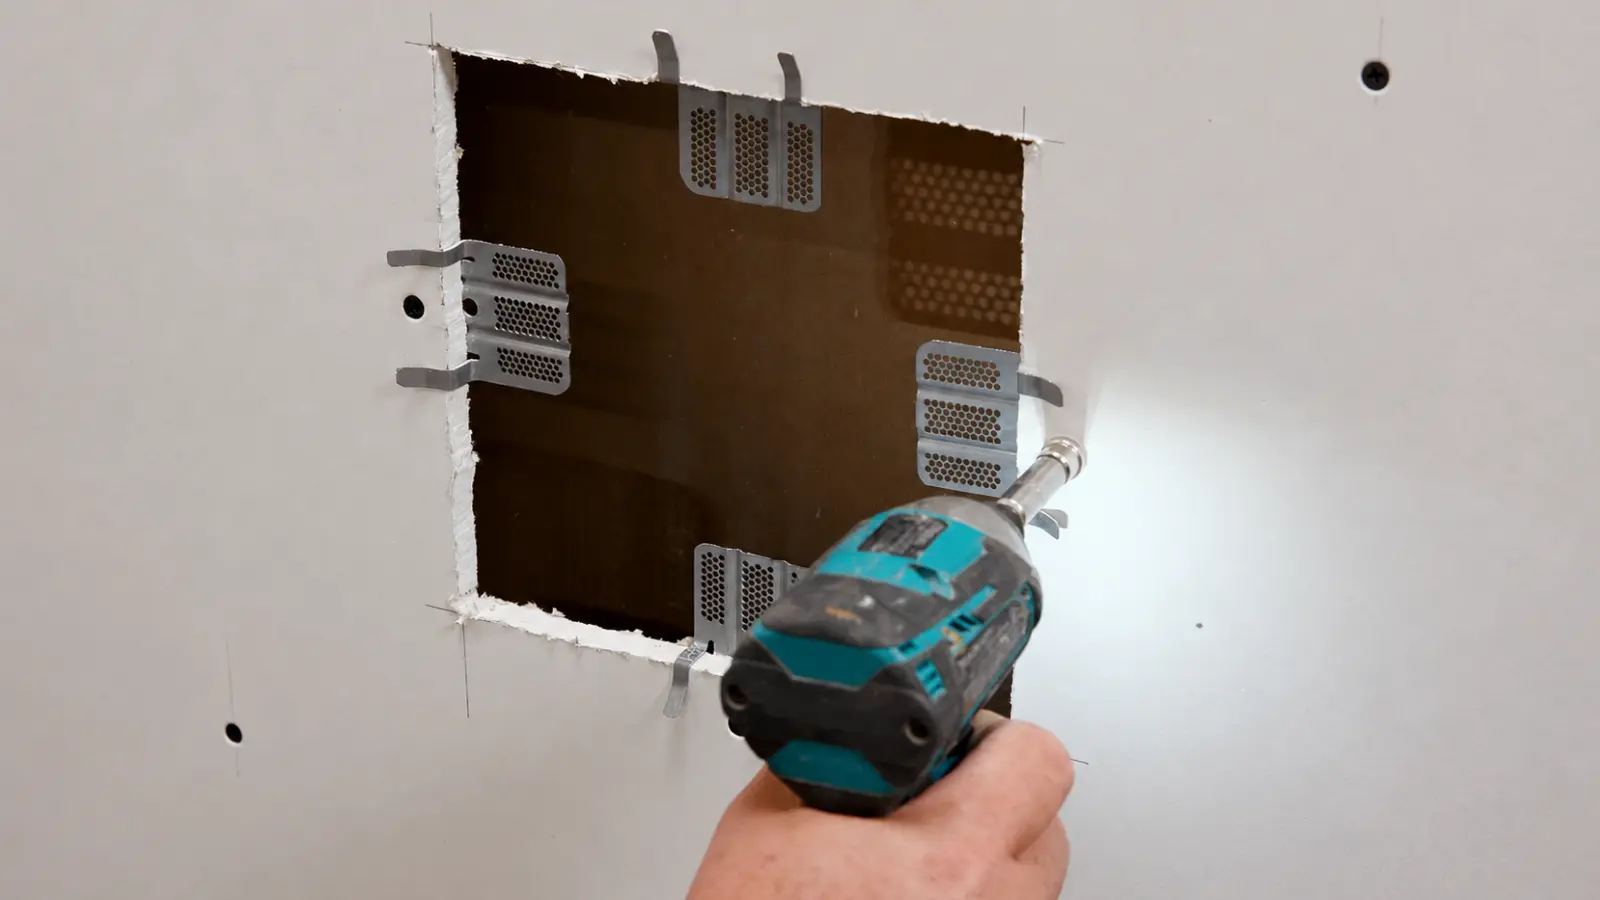
Clips give the new panel something to bear against at its edges. The package instructions control the details. USG’s repair-kit instructions work like this.
- Cut out the damaged section. USG’s instructions cut along the studs with a utility knife and between the studs with a keyhole saw. Locate the framing first, and confirm the opening is clear of utilities.
- Attach the clips. Slip a clip onto each edge of the opening. Screw through the wall into each clip about 3/4 inch from the edge, centered between the tabs.
- Cut and set the new panel. Measure the opening and cut a panel of the same thickness to fit without forcing the edges.
- Fasten the panel. Screw through the new panel into each clip, opposite the screw that holds the clip and about 3/4 inch from the edge.
- Remove the tabs. Snap off the clip tabs. The face of the new panel should sit even with the wall.
A patch set too deep creates a wide finishing problem, and one set proud of the wall is hard to hide without a broad buildup of compound. Fix the depth now, before any compound goes on.
Tape, Compound, Sand, Prime, and Paint
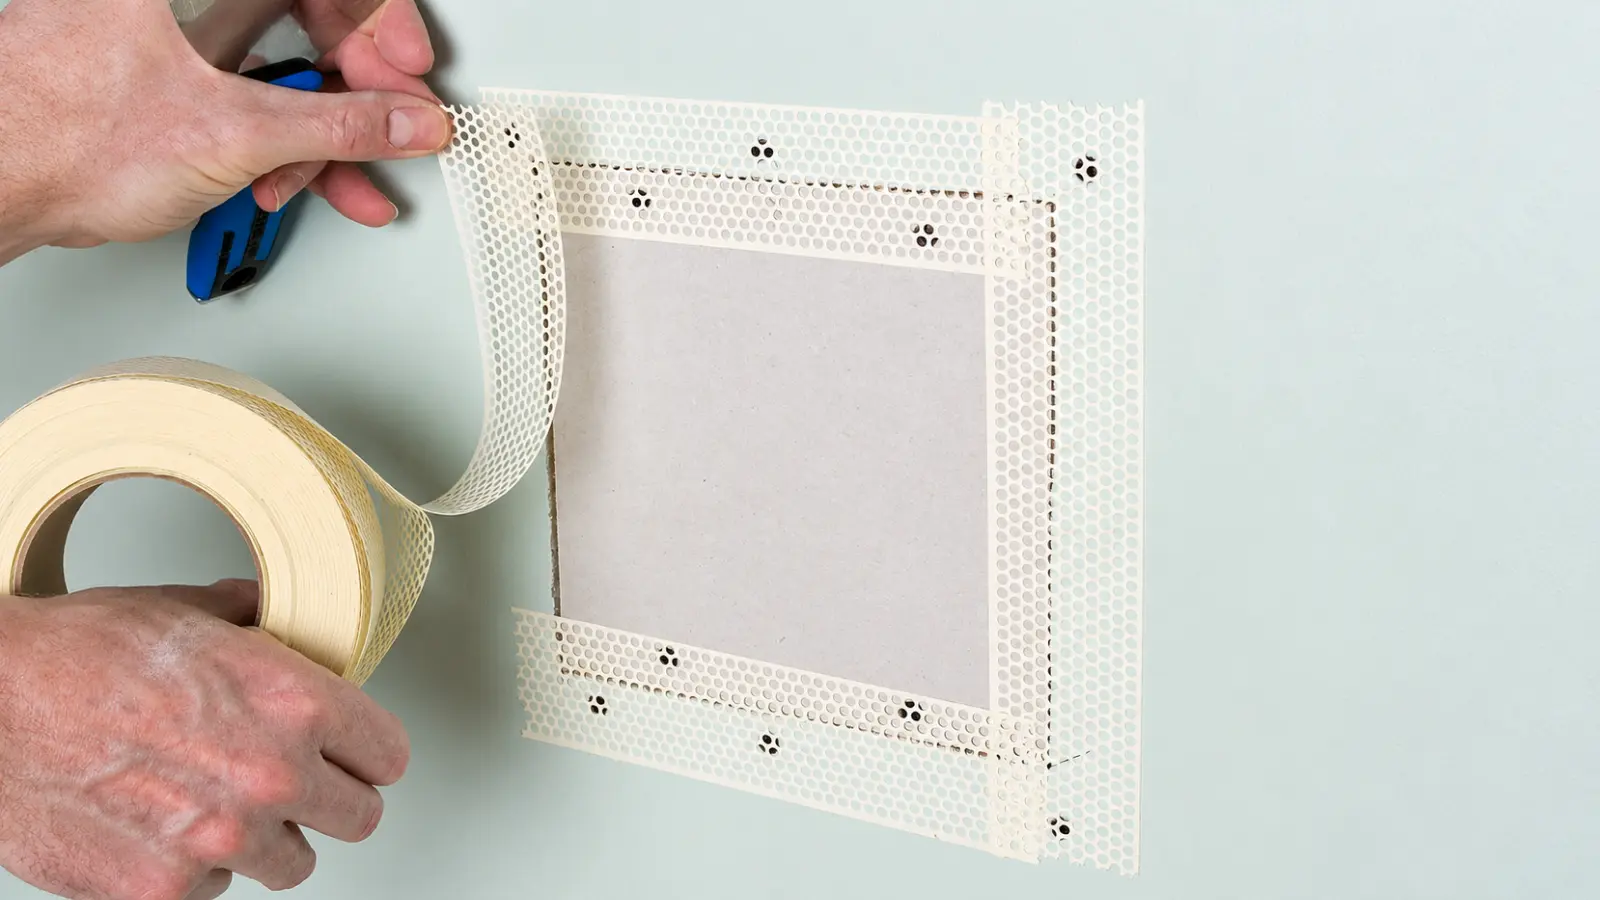
Most of the visual quality comes from the finishing stages. A securely installed panel can still show through paint if the seam is thick, the edges are abrupt, or the surface was not primed. Method A already includes its own thin skim coats. Method B needs tape.
Tape the Seams
Treat each seam as a new drywall joint. USG’s instructions apply compound and tape to all four sides of the repaired section and do not overlap the tape. The tape reinforces the transition, and the compound builds the finish around it. Embed the tape firmly and keep the first coat thin.
Build the Finish in Thin Coats
Apply a second and a third coat, letting each dry before the next, and widen each coat so the transition from patch to wall is gradual. Thick compound dries unevenly, sands poorly, and leaves a hump.
Drying time depends on the compound, and dry to the touch is not the same as dry through. Label times run from roughly one to two hours for setting-type compounds to about a day between coats of ready-mixed compound, depending on temperature and humidity. Plan the job in sessions rather than one afternoon unless you use a setting-type compound.
Sand Flush
Sand once the compound is fully dry. USG suggests 150-grit or finer for dry sanding, and sanding with a damp sponge cuts dust. Stop when the surface is flush. Do not sand through the paper face of the existing drywall. Check the surface with a flashlight held at a low angle, and use the damp methods from the lead warning above if the paint may contain lead.
Prime and Paint
Compound and painted drywall absorb paint differently, so USG’s instructions call for a prime coat before painting. Follow the primer and paint manufacturer’s directions for drying and recoating. If the wall is textured, recreate the texture before priming. The priming and touch-up section of the small-hole guide covers flashing, sheen, and texture matching.
Ceilings, Water Damage, and Fire-Rated Walls
Ceilings
A ceiling patch is not a wall patch done overhead. USG’s clips are intended for ceilings as well as walls, but overhead work is less forgiving. You have to hold the replacement piece in place while you fasten it, work from a stable ladder or platform without overreaching, and deal with dust falling on you. A ceiling that is wet, bowed, or cracked around the opening should be assessed before any patching begins.
Water Damage
Fix the leak or source first. The EPA says to dry water-damaged areas within 24 to 48 hours to prevent mold growth, and that moisture control is the key to mold control. Do not paint or caulk over mold. Clean it up and dry the surface first, because paint applied over moldy surfaces is likely to peel.
The EPA says homeowners can usually handle mold covering less than about 10 square feet, and that larger areas or heavy water damage call for more than a DIY cleanup, pointing to its remediation guidance and to experienced contractors. If the damage came from sewage or other contaminated water, call a professional experienced with it. If you suspect mold behind the board, consider hiring an experienced professional rather than opening the wall yourself.
Fire-Rated Walls and Ceilings
Some walls and ceilings are part of a fire-rated assembly, and a repair has to preserve that rating. Do not improvise the panel, backing, fasteners, or seam treatment. USG sells repair clips designed to maintain one-hour ratings in repaired areas, and the Gypsum Association publishes GA-225 on repairing fire-rated systems. You can’t tell from the surface whether a wall is rated. Possible locations include walls and ceilings between a garage and the living space or between units in a multifamily building, so ask the building owner or manager, or check with your local building department.
When to Call for Help
Get more information or qualified help when the repair crosses from damaged drywall into an unknown wall or ceiling condition. Common stop points include:
- visible or suspected wiring, plumbing, ducts, or other utilities in the repair path
- wet, moldy, sagging, or extensively water-damaged drywall, or any sewage or contaminated water
- split, decayed, displaced, or otherwise damaged framing
- a ceiling opening that can’t be safely reached or supported
- a possible fire-rated separation whose details you can’t confirm
- an inaccessible cavity where the repair can’t be properly supported or inspected
- a pre-1978 home where you don’t want to do lead-safe work yourself
These conditions do not mean every repair needs a contractor. They mean the right next decision depends on facts a surface patch can’t reveal.
How to Patch a Large Hole in Drywall for a Secure, Smooth Finish
Knowing how to patch a large hole in drywall means restoring a solid section of wall before worrying about how the repair looks. Whether you use a California patch, drywall repair clips, or a replacement piece supported by framing, the patch must fit properly and remain stable. Thin coats of joint compound, careful sanding, appropriate priming, and matching paint help the finished area blend into the surrounding wall.
Before considering the repair complete, check that the patch feels secure and the surface is smooth under low-angle lighting. If the drywall moves, the surrounding material is damaged, or the wall has unresolved moisture or fire-resistance concerns, address those issues first. A durable repair depends on sound support and the right method, not simply on covering the opening.
Frequently Asked Questions
Can you patch a large hole in drywall without replacing the whole sheet?
Yes. Most localized holes can be repaired by replacing only the damaged section. Depending on the opening, you can use a California patch, drywall repair clips or backing attached to the framing. The replacement piece must be properly supported and finished with joint compound, tape where required, primer and paint.
How big a drywall hole can you patch without using studs?
A California patch can repair openings approximately 6 by 6 inches or smaller without additional backing, provided the surrounding drywall is sound. Larger openings may be repaired using drywall clips or other suitable supports without extending the cut to the studs. Always follow the chosen repair system’s instructions.
Can you fill a large drywall hole with spackle?
No. Spackle and joint compound are finishing materials, not substitutes for missing drywall or structural support. Filling a large unsupported opening can cause cracking, sagging or failure. Install a properly supported drywall patch first, then use joint compound to reinforce and smooth the surrounding seams.
How long does it take to patch a large hole in drywall?
A large drywall patch generally requires several work sessions because joint compound must dry or set sufficiently between coats. Setting-type compounds can shorten the process, while ready-mixed compounds may require about a day between applications. Total time depends on the patch size, product instructions, temperature, humidity and finishing requirements.
Can you repair a large hole in drywall without using tape?
A properly installed California patch uses its retained face paper as a reinforcing flange, so separate joint tape is generally unnecessary. Repairs made with drywall clips or replacement sections typically require taped seams. The correct method depends on the patch design, product instructions and any applicable fire-resistance requirements.
How do you make a large drywall patch invisible after painting?
Set the replacement drywall flush with the surrounding wall, reinforce the seams as required and apply several thin coats of joint compound, feathering each coat outward. Sand smooth, recreate any existing texture and prime before painting. Matching the original paint color and sheen helps the repaired area blend into the wall.